- You have no items in your shopping cart
- Continue Shopping

Rolling the perfect joint, blunt, or spliff is an art form that requires a combination of skill, patience, and the right tools. Whether you’re a beginner or a seasoned pro, understanding the differences between these smoking methods and mastering the techniques to roll them will ensure a smoother, more enjoyable experience. In this guide, we’ll walk you through the process step by step, and offer expert tips and tricks to help you perfect your rolls.
Understanding Joints, Blunts, and Spliffs
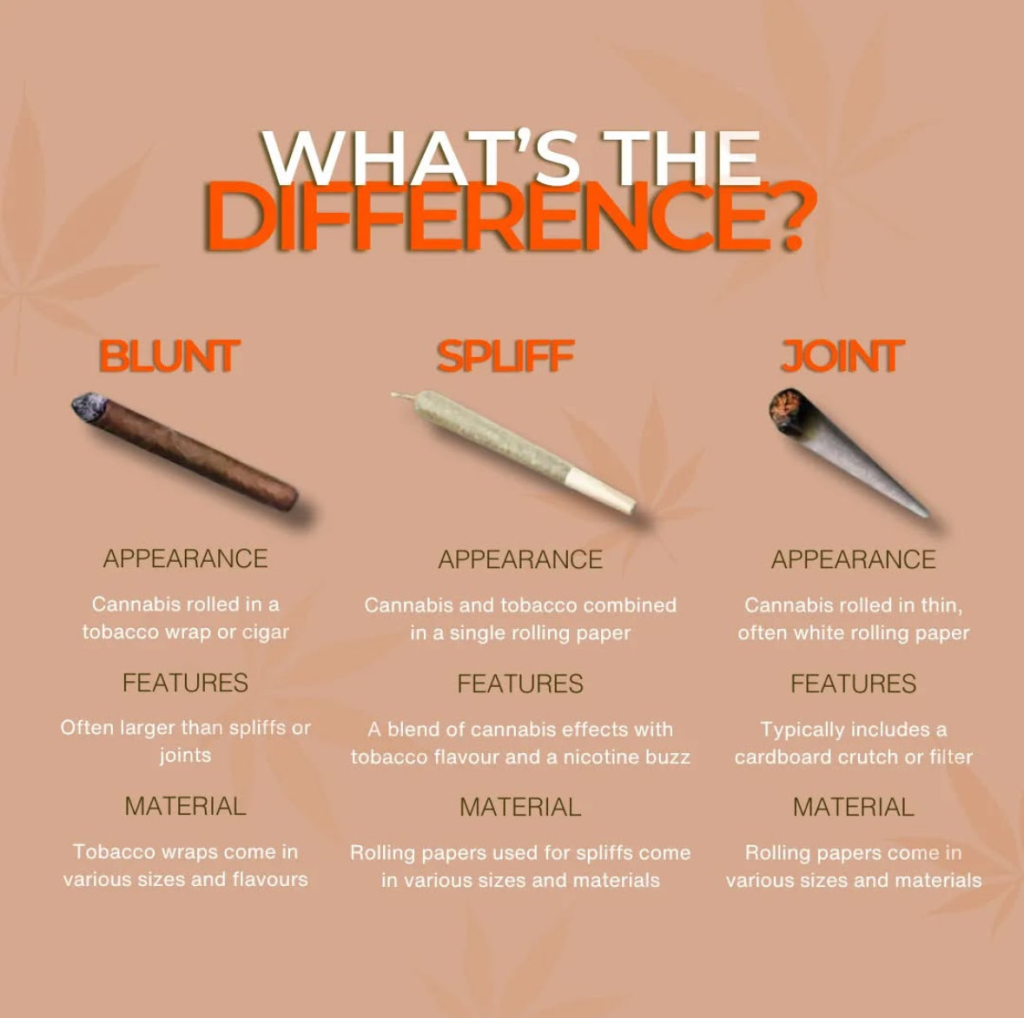
Before diving into the rolling process, it’s important to understand what each term means and the subtle differences between them. While all three involve cannabis, the materials and methods differ, giving each its own unique smoking experience.

What Is a Joint?
A joint is the most iconic and straightforward way to smoke cannabis. It’s typically rolled using thin rolling papers and contains just cannabis—no tobacco. Joints come in various sizes, from small “pinners” to larger “king-size” options, depending on your preference.
Key features of a joint:
- Cannabis content: Only cannabis Flower .
- Rolling paper: Thin paper, typically hemp or rice.
- No tobacco: A joint is purely cannabis, often without additives or extra ingredients.
Pros: Small, portable, easy to roll (once you get the hang of it), and perfect for solo sessions or sharing with friends.
Cons: Requires some skill to roll neatly, and the paper can affect the taste of the cannabis.
What Is a Spliff?
A spliff is similar to a joint, but with the addition of tobacco mixed in with the cannabis. This gives the smoker an extra energetic and heady buzz, as tobacco’s stimulating effects blend with the relaxing effects of cannabis. Spliffs are popular in Europe but have found their way to the North American market too.
Key features of a spliff:
- Cannabis content: Cannabis Flower and tobacco mixed.
- Rolling paper: Thin paper, typically similar to joint paper.
- Tobacco content: Usually a higher ratio of tobacco than a blunt.
Pros: A spliff offers a smoother, sometimes more social smoke, and is often a good choice for those who enjoy both tobacco and cannabis.
Cons: Tobacco’s health risks apply, and it can overpower the flavour of the cannabis, making it less ideal for those who are all about the taste.
What Is a Blunt?
A blunt is a cannabis roll wrapped in a tobacco leaf or tobacco-based paper. While the filling is almost always cannabis, the key difference is the tobacco leaf wrap. This adds a distinct flavour and extra buzz from the nicotine, making blunts popular in social circles or for longer smoking sessions.
Key features of a blunt:
- Cannabis content: Typically cannabis with no tobacco in the filling, but wrapped in tobacco leaves.
- Wrap material: Tobacco leaves or pre-made blunt wraps.
- Size: Generally larger than joints or spliffs, meaning they can hold more cannabis.
Pros: Blunts are great for social situations, providing a slow burn and the added buzz of nicotine.
Cons: Like spliffs, the tobacco content adds health risks, and the nicotine flavour can overpower the cannabis for some smokers.
Understanding Cannabis Flower Strains
Now that we’ve clarified the difference between joints, spliffs, and blunts, it’s time to gather the necessary materials and tools. From the right cannabis flower strain to selecting the perfect paper, each element will affect the overall smoking experience.
Choosing Your Cannabis
The first step in creating a great roll is selecting the right cannabis. There are two primary types of cannabis to consider:
- Indica: Known for its relaxing, sedative effects, ideal for evening use.
- Sativa: More energising and uplifting, perfect for daytime smoking.
Whether you’re rolling a joint, spliff, or blunt, the cannabis you choose will impact the flavour and effects. Be sure to select fresh, high-quality cannabis—vibrant green buds with a fragrant aroma are key. Avoid buds that have a musty smell or appear mouldy, as these can negatively affect both taste and health.
Choosing the Right Rolling Paper
The rolling paper you use can impact the flavour and burn of your joint. With a variety of materials and sizes to choose from, it’s important to select one that complements your cannabis and personal preferences.
Types of Rolling Papers
- Material: Rolling papers are usually made from hemp, rice, or wood pulp. Hemp papers burn cleanly with minimal taste interference, while rice papers tend to burn slower, making them great for a longer session. Wood pulp papers are thicker but can affect the taste slightly.
- Size: Papers come in various sizes, with the most common being 1.25 inches (about 3.2 cm), 1.5 inches (about 3.8 cm), and king size (around 4.4 inches or 11.2 cm). The size of your paper will determine how much cannabis it can hold and how long it will burn. For most standard joints, 1.25-inch papers work well, but if you want a larger joint, you can go for 1.5-inch or king-size.
- Flavoured Papers: Some brands offer flavoured rolling papers. While these can enhance the experience for some, others prefer the natural taste of the cannabis itself. It’s worth experimenting to see which type suits you best.
Popular and reliable brands include RAW, Zig-Zag, and OCB, but feel free to explore different options until you find what you like.

Essential Rolling Tools
In addition to cannabis and papers, a few tools can make your joint-rolling experience smoother and more efficient:
- Grinder: A grinder is essential for breaking down cannabis flower into a uniform texture, ensuring an even burn. While you can break it up by hand, using a grinder will give you better consistency and save you time.
- Filters or Crutches: Filters, also known as crutches, provide structure to the joint and prevent cannabis from falling into your mouth. They also protect your fingers from the heat as you smoke. You can either buy pre-made filters or create your own by rolling a small piece of cardboard into a cylinder.
- Rolling Tray: A rolling tray helps keep all your materials organised, minimising mess and helping you avoid losing any precious cannabis. It’s a great tool for beginners and seasoned rollers alike.
- Packing Tool: If you want to ensure an even distribution of cannabis in your joint, a packing tool (like a pen or chopstick) can help. This tool is particularly useful for larger joints, ensuring an even burn.
Step-by-Step Guide to Rolling the Perfect Joint
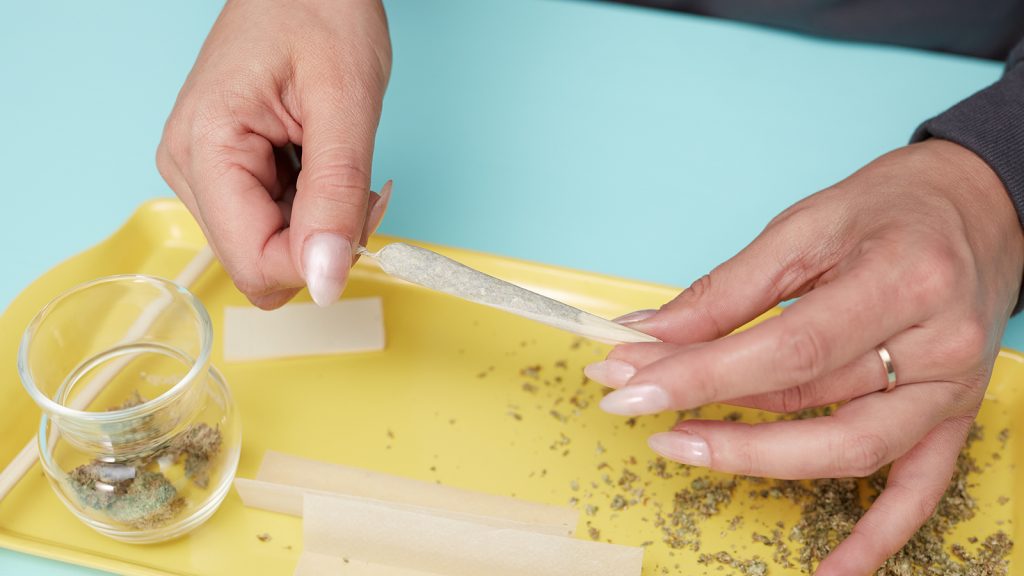
Now that you’re familiar with the essentials, let’s dive into the step-by-step process for rolling the perfect joint.

Step 1: Grind Your Cannabis
Grinding your cannabis evenly is key to achieving a consistent burn. The grinder should break the buds into small, even pieces—neither too coarse nor too fine. If the cannabis is too fine, it may clog the joint; if it’s too coarse, it could burn unevenly.
For a standard joint, about 0.5 grams (or half a gram) of cannabis is ideal, but adjust the quantity based on the size of the joint you want to roll.
Step 2: Create the Filter (Crutch)
Filters (or crutches) help with airflow and prevent cannabis from falling out while also making the joint more stable. To create your own filter:
- Take a small piece of cardboard (like a business card) and fold one end into an accordion shape.
- Roll the rest of the cardboard around the accordion folds to form a cylinder. This will prevent any cannabis from being inhaled during your session.
You can also purchase pre-made filters, but a DIY approach is often just as effective.
Step 3: Fill the Paper
Lay the rolling paper flat with the glue strip facing you. Place the filter at one end of the paper and evenly distribute the ground cannabis along the length of the paper. Try to avoid overfilling, as this can affect the airflow and make it harder to smoke.
Step 4: Roll the Joint
Now comes the fun part—rolling! There are two common methods for rolling joints:
- Pinch Technique: This method is ideal for beginners. Simply pinch the sides of the paper between your fingers and gently rock it back and forth to shape the cannabis into a cylinder.
- Tuck-and-Roll Method: For a tighter joint, tuck the unglued edge of the paper into the roll. Using your thumbs, continue rolling upwards, securing the glued edge to seal the joint.
Make sure you don’t overpack the joint, as this can restrict airflow and make it difficult to smoke.
Step 5: Seal the Joint
Once the cannabis is evenly distributed and the paper is rolled, lick the glue strip and seal the joint. Make sure the edge is firmly sealed to prevent it from unraveling during smoking.
Step 6: Pack the End
Use a pen or similar tool to gently pack the open end of the joint, ensuring the cannabis is snug but not too tightly packed. This will allow for smooth airflow while smoking. Twist the end to seal it, and your joint is ready to go.

Troubleshooting: Common Mistakes and How to Avoid Them
Rolling the perfect joint takes practice, and it’s easy to make a few mistakes along the way. Here are some common pitfalls and tips on how to fix them:
- Overfilling the Joint: Packing too much cannabis flower can cause the joint to burn unevenly or restrict airflow. Stick to about 0.5 grams (half a gram) for a standard joint and adjust based on your preferences.
- Inconsistent Roll Tension: If you roll too tightly, the joint will be difficult to smoke, while a loose roll can cause it to burn too quickly. Aim for a balanced, moderate pressure.
- Skipping the Grinder: Using whole buds or crumbling cannabis by hand can lead to uneven pieces that burn inconsistently. Always grind your cannabis for the best results.
- Improper Filter Placement: An improperly placed filter can affect the structure of your joint. Make sure the filter is snug at the base and properly aligned with the cannabis.
Advanced Techniques for the Experienced Joint Roller
Once you’ve mastered the basics, you can try your hand at more advanced rolling techniques like the cone-shaped joint or even a cross joint.
The Cone-Shaped Joint
The cone-shaped joint is wider at the tip and tapers toward the filter, allowing for a gradual increase in intensity as it burns. To roll a cone:
- Start by filling the paper with less cannabis near the filter and more toward the tip.
- Roll from the filter end, allowing the paper to naturally form a cone shape.
- Seal the joint tightly, ensuring the wide end is well-packed but not overfilled.
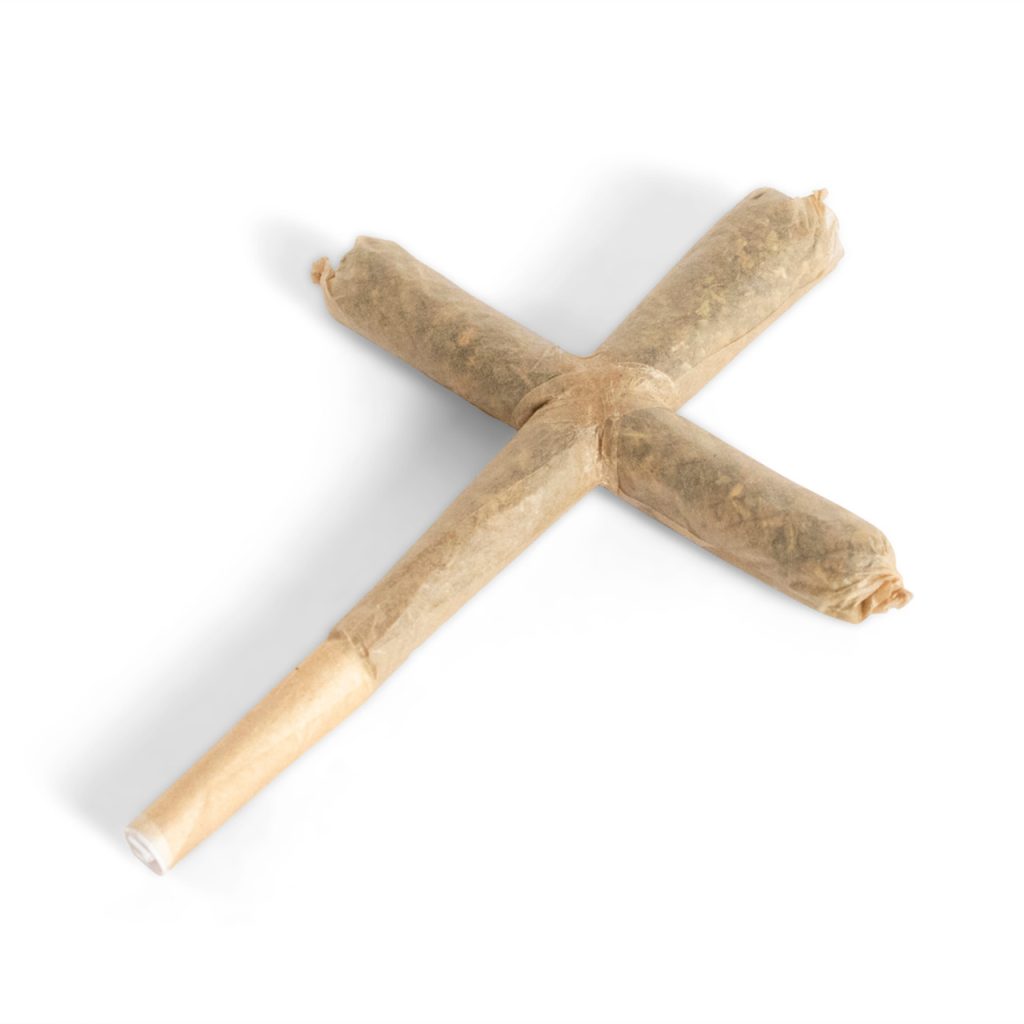
The Cross Joint
A cross joint is a fun and impressive design, made by connecting two joints in the shape of a cross. To roll one:
- Roll one thick joint and one thinner joint.
- Use a pin or needle to make a hole halfway down the thick joint.
- Insert the thinner joint perpendicularly through the hole.
- Seal the junction with strips of rolling paper to ensure an airtight fit.

Final Thoughts: Rolling Responsibly
Mastering the art of rolling a joint, blunt, or spliff is a satisfying skill that enhances your cannabis experience. Whether you prefer a classic joint, a cone, or an intricate cross joint, the key is to practice and enjoy the process. Remember to consume responsibly, staying mindful of both the effects of cannabis and the potential health risks of smoking.
With the right tools, techniques, and a bit of practice, you’ll soon be rolling perfect joints every time. Enjoy the journey!
Disclaimer: This content is for educational purposes only. The information provided is derived from research gathered from external sources.
- https://www.wikihow.com/Roll-a-Marijuana-Joint
- https://cannabisandglass.com/how-to-roll-a-joint-like-the-experts-do/
- https://www.nuggmd.com/blog/how-to-roll-a-joint
